Integrations
NumPy
Install NumPy:
pip install numpy
Or see the NumPy docs for advanced installation options.
Use NumPy to build and view your data:
import numpy as np
from itkwidgets import view
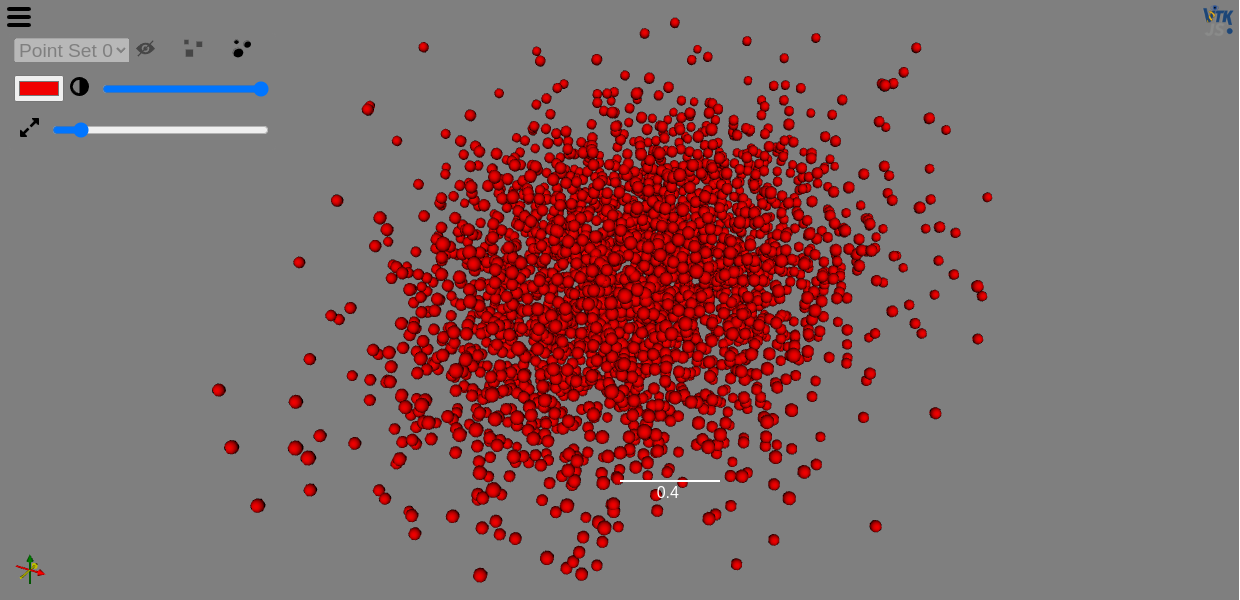
number_of_points = 3000
gaussian_mean = [0.0, 0.0, 0.0]
gaussian_cov = [[1.0, 0.0, 0.0], [0.0, 2.0, 0.0], [0.0, 0.0, 0.5]]
point_set = np.random.multivariate_normal(gaussian_mean, gaussian_cov, number_of_points)
view(point_set=point_set)
Or check out the NumPyArrayPointSet example notebook to try it out for yourself!
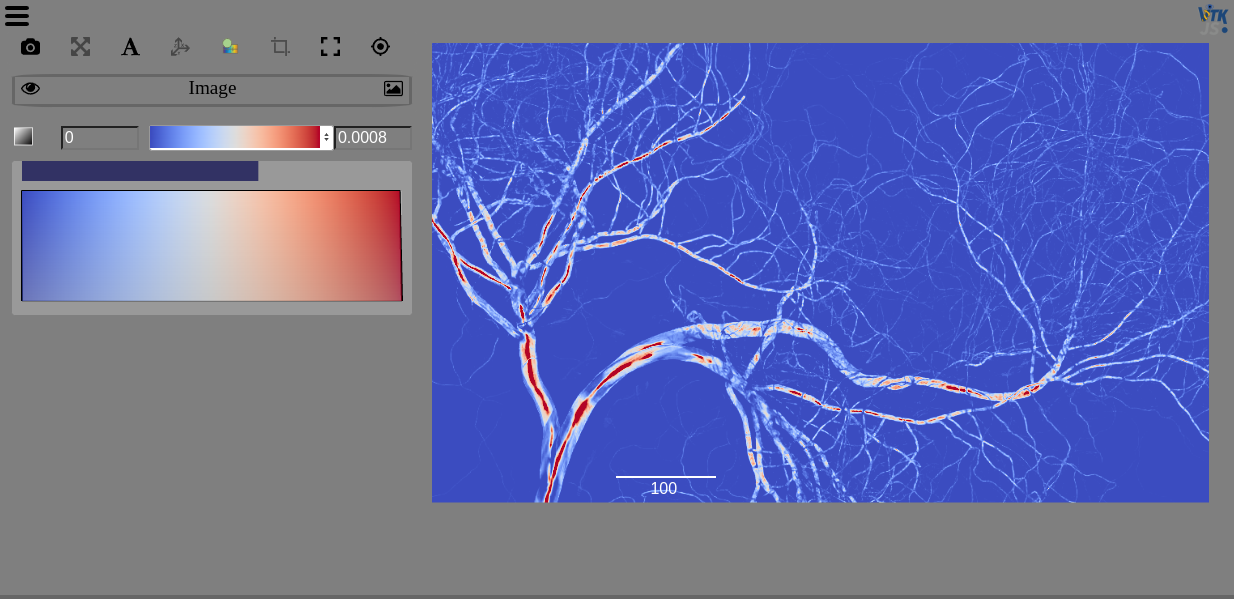
ITK-Wasm
ITK-Wasm combines ITK and WebAssembly to enable high-performance spatial analysis in a web browser or system-level environments and reproducible execution across programming languages and hardware architectures.
In Python, ITK-Wasm works with simple, Pythonic data structures comprised of Python dictionaries, lists, and NumPy arrays.
Install an ITK-Wasm package. For example:
pip install itkwasm-image-io
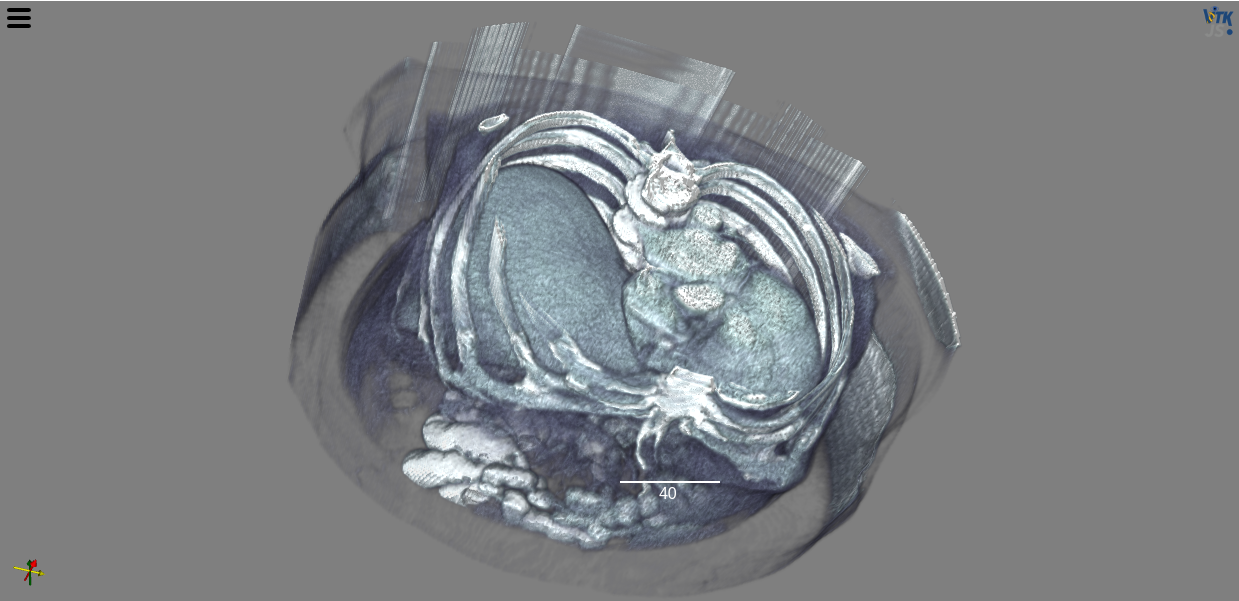
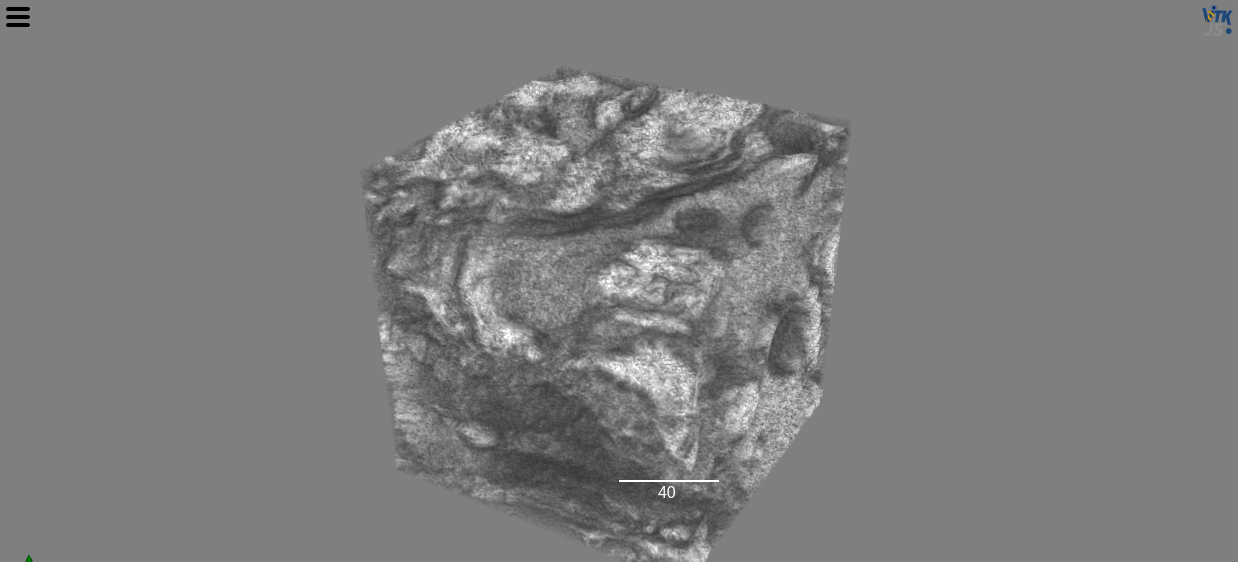
You can use ITK-Wasm to read in and filter your data before displaying and interacting with it with the Viewer.
import os
from itkwasm_image_io import imread
from itkwidgets import view
from urllib.request import urlretrieve
# Download data
file_name = '005_32months_T2_RegT1_Reg2Atlas_ManualBrainMask_Stripped.nrrd'
if not os.path.exists(file_name):
url = 'https://data.kitware.com/api/v1/file/564a5b078d777f7522dbfaa6/download'
urlretrieve(url, file_name)
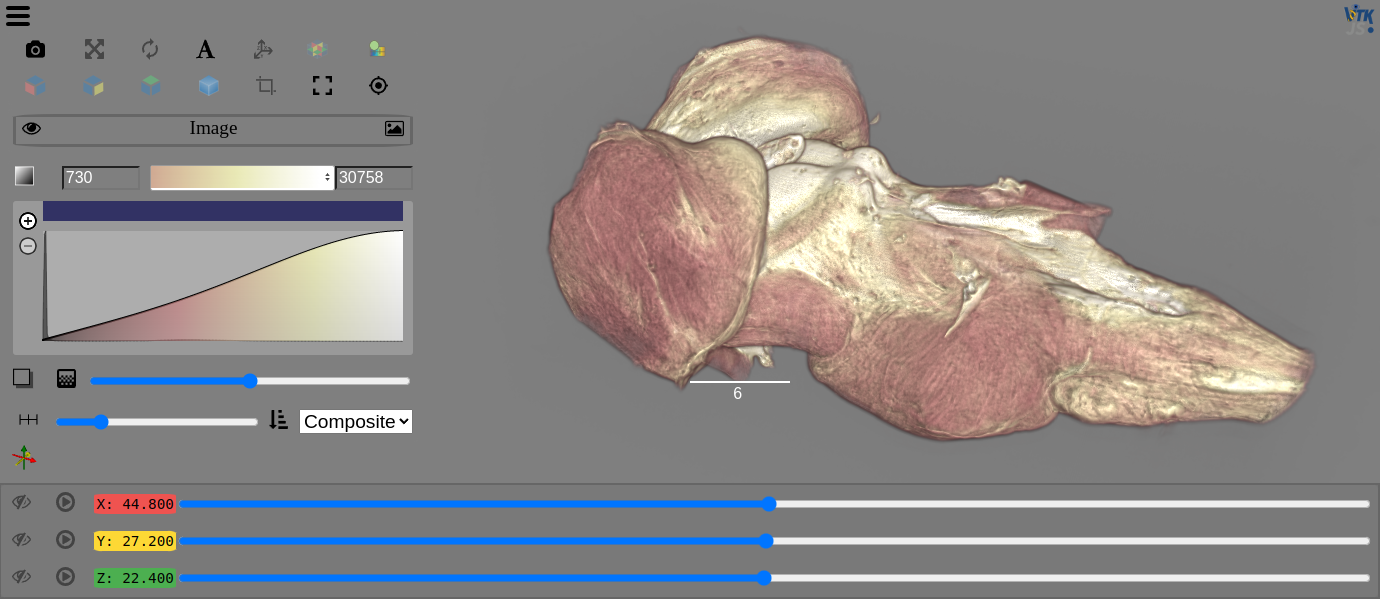
image = imread(file_name)
view(image, rotate=True, gradient_opacity=0.4)
Get started with ITK in the 3DImage notebook. You can also visit the ITK-Wasm docs for more information and see the ITK-Wasm packages for additional examples.
ITK
Install ITK:
pip install itk-io
You can use ITK to read in and filter your data before displaying and interacting with it with the Viewer.
import os
import itk
from itkwidgets import view
from urllib.request import urlretrieve

# Download data
file_name = '005_32months_T2_RegT1_Reg2Atlas_ManualBrainMask_Stripped.nrrd'
if not os.path.exists(file_name):
    url = 'https://data.kitware.com/api/v1/file/564a5b078d777f7522dbfaa6/download'
    urlretrieve(url, file_name)

image = itk.imread(file_name)
view(image, rotate=True, gradient_opacity=0.4)
Get started with ITK in the 3DImage notebook. You can also visit the ITK docs for additional examples for getting started.
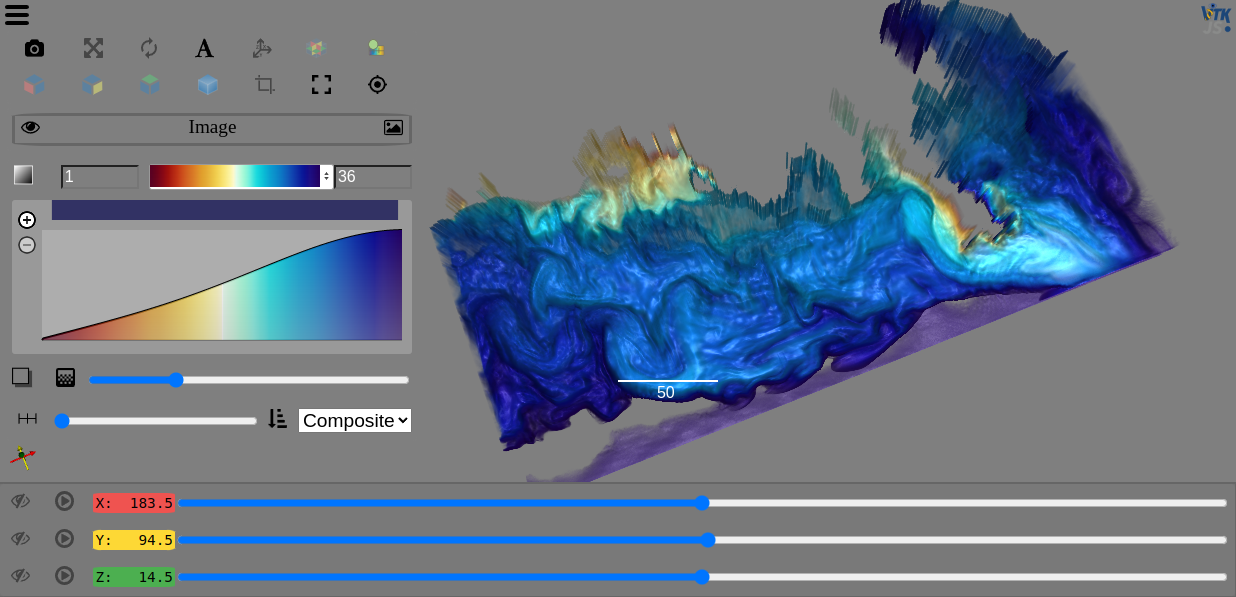
VTK
Install VTK:
pip install vtk
You can build you own VTK data or read in a file to pass to the Viewer.
import os
import vtk
from itkwidgets import view
from urllib.request import urlretrieve
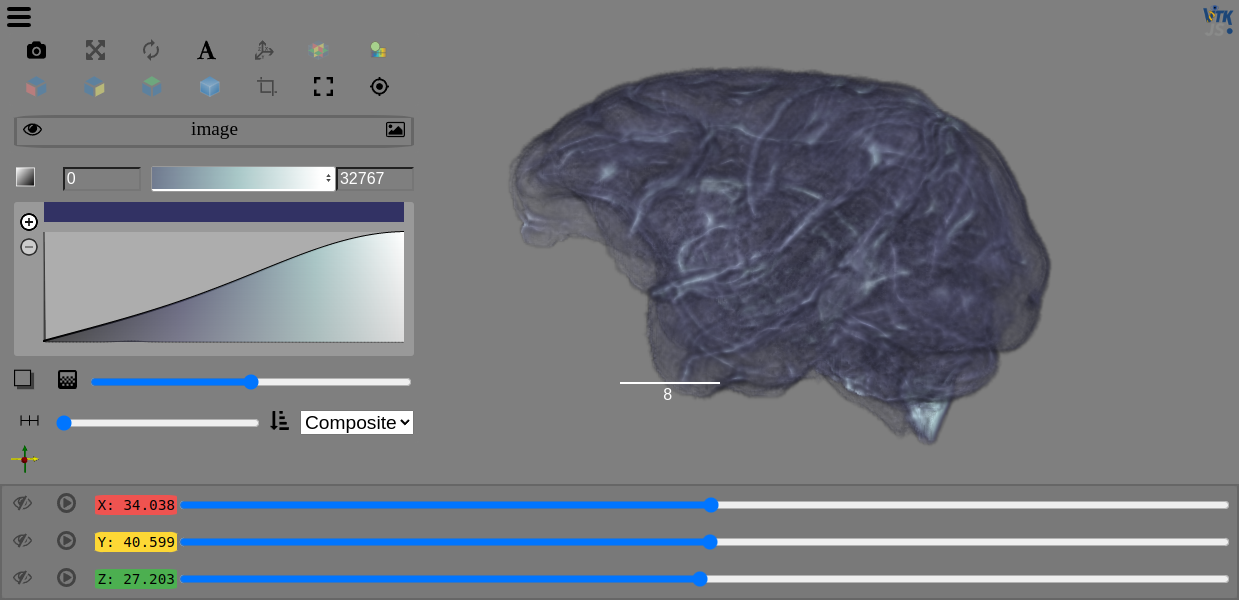
# Download data
file_name = 'vase.vti'
if not os.path.exists(file_name):
url = 'https://data.kitware.com/api/v1/file/5a826bdc8d777f0685782960/download'
urlretrieve(url, file_name)
reader = vtk.vtkXMLImageDataReader()
reader.SetFileName(file_name)
reader.Update()
vtk_image = reader.GetOutput()
viewer = view(vtk_image)
Please be sure to check out the extensive list of Python VTK examples that are available for the majority of the available VTK classes, or jump right in with the vtkImageData or vtkPolyDataPointSet example notebooks.
MONAI
MONAI is a PyTorch-based, open-source framework for deep learning in healthcare imaging. Get started by installing MONAI:
pip install monai
By default only the minimal requirements are installed. The extras syntax can be used to install optional dependencies. For example,
pip install 'monai[nibabel, skimage]'
For a full list of available options visit the MONAI docs.
Check out the transform_visualization notebook for an example of visualize PyTorch tensors.
dask
Dask offers options for installation so that you include only as much or little as you need:
pip install "dask[complete]"    # Install everything
pip install dask                # Install only core parts of dask
pip install "dask[array]"       # Install requirements for dask array
pip install "dask[dataframe]"   # Install requirements for dask dataframe
See the full documentation for additional dependency sets and installation options.
You can read in and visualize a dask array in just a few lines of code:
import os
import zipfile
import dask.array.image
from itkwidgets import view
from urllib.request import urlretrieve

# Download data
file_name = 'emdata_janelia_822252.zip'
if not os.path.exists(file_name):
    url = 'https://data.kitware.com/api/v1/file/5bf232498d777f2179b18acc/download'
    urlretrieve(url, file_name)
with zipfile.ZipFile(file_name, 'r') as zip_ref:
    zip_ref.extractall()

stack = dask.array.image.imread('emdata_janelia_822252/*')

view(stack, shadow=False, gradient_opacity=0.4, ui_collapsed=True)
Try it yourself in the DaskArray notebook.
xarray
Xarray uses labels (dimensions, coordinates and attributes) on top of raw data to provide a powerful, concise interface with operations like
x.sum('time')
Xarray has a few required dependencies that must be installed as well:
pip install numpy     # 1.18 or later
pip install packaging # 20.0 or later
pip install pandas    # 1.1 or later
pip install xarray
Build your own xarray DataArray or Dataset or check out xarray-data for sample data to visualize.
import numpy as np
import xarray as xr
from itkwidgets import view

ds = xr.tutorial.open_dataset("ROMS_example.nc", chunks={"ocean_time": 1})

view(ds.zeta, ui_collapsed=False, cmap="Asymmtrical Earth Tones (6_21b)", sample_distance=0)
The DataArray notebook provides an example using the ROMS_example provided by xarray-data.
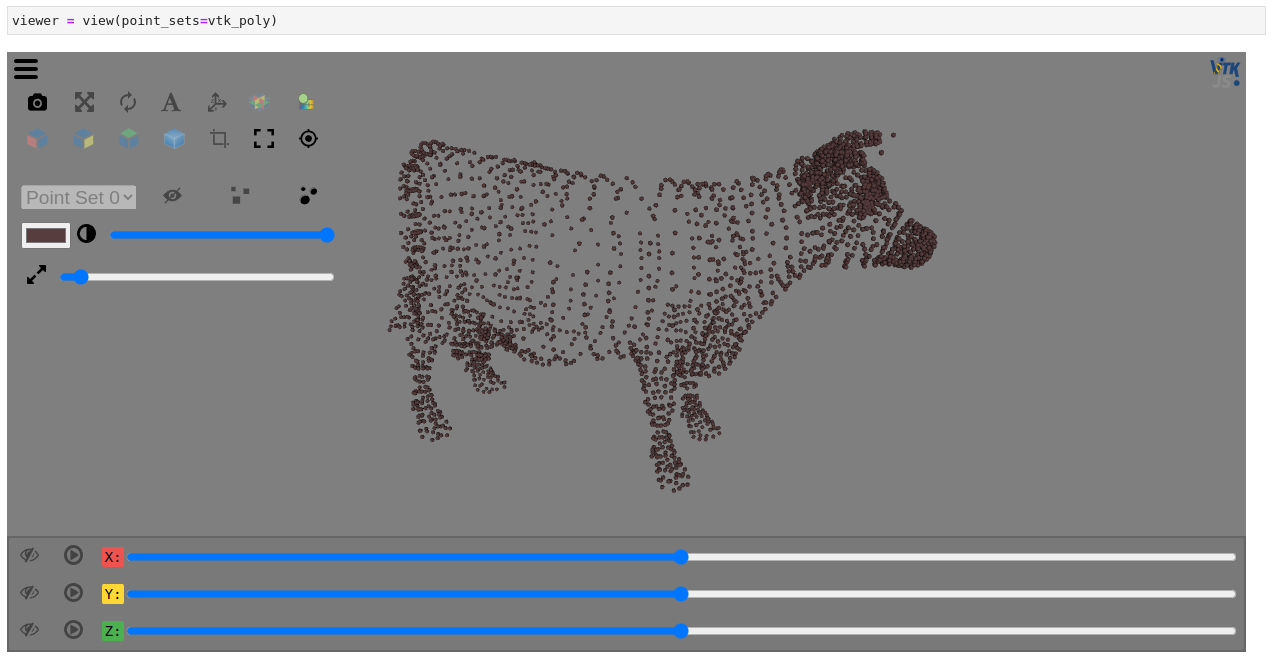
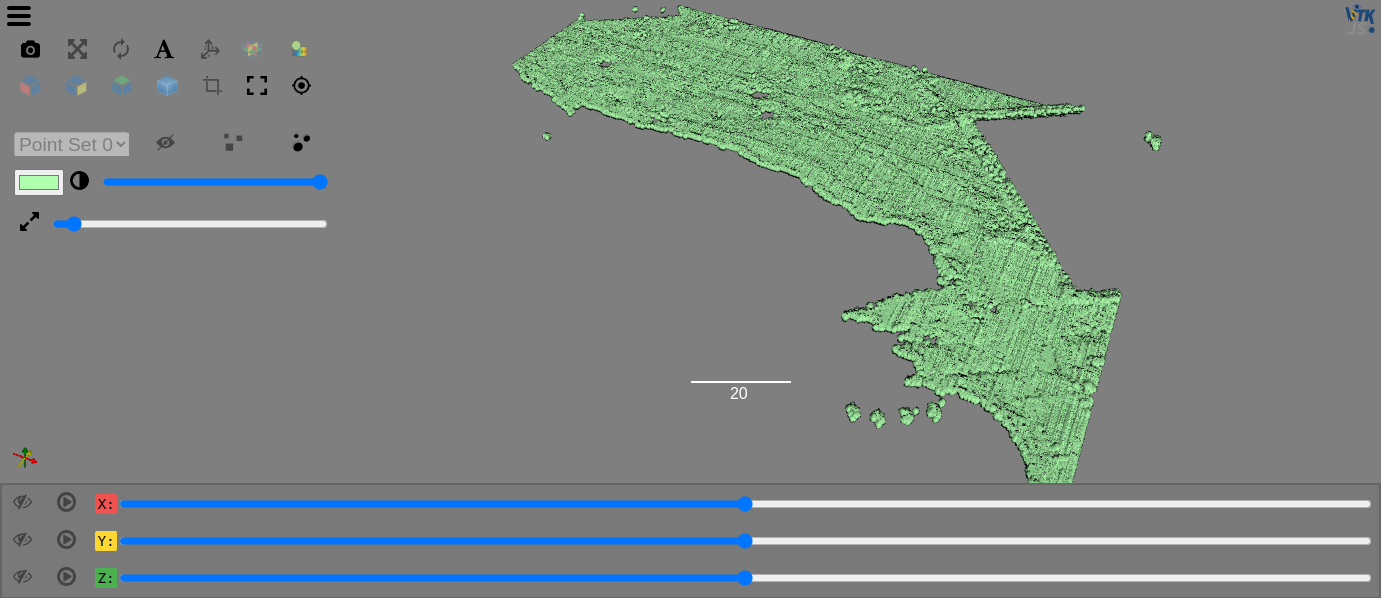
PyVista
PyVista is Pythonic VTK, providing mesh data structures and filtering methods for spatial datasets and is easy to install and get started with:
pip install pyvista
The Core API provides an overview of the supported data types and the examples module provides a nice selection of sample data that you can use to get started.
The UniformGrid and LiDAR notebooks demonstrate PyVista data being visualized with the Viewer.
PyImageJ
PyImageJ provides a set of wrapper functions for integration between ImageJ2 and Python and the simplest way to install PyImageJ is with Conda because if you use pip you will need to manage the OpenJDK and Maven dependencies separately. See the Conda docs for installation on your system or follow PyImageJ’s suggestion of using Mamba (install Mambaforge).
mamba create -n pyimagej pyimagej openjdk=8
For more detatiled installation instructions and alternativate options like pip, see the PyImageJ installation docs.
Run the ImageJImgLib2 notebook to see how we can load images and apply filters before viewing them in the Viewer.
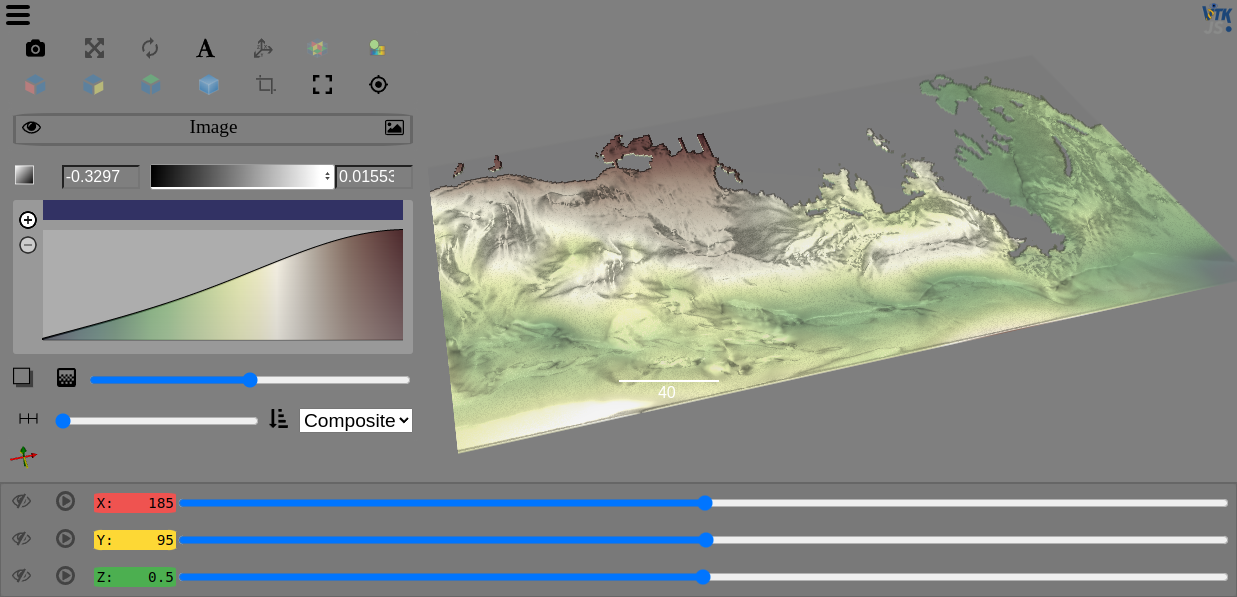
Zarr
Zarr is a format for the storage of chunked, compressed, N-dimensional arrays that supports chunking arrays along any dimension, reading or writing arrays concurrently from multiple threads or processes, as well as organizing arrays into hierarchies via groups.
To install Zarr:
pip install zarr
You can use Zarr to read data stored locally or on S3, as we do in the OME-NGFF-Brainstem-MRI example notebook.
from zarr.storage import FSStore

fsstore = FSStore('https://dandiarchive.s3.amazonaws.com/zarr/7723d02f-1f71-4553-a7b0-47bda1ae8b42')
brainstem = zarr.open_group(fsstore, mode='r')

view(brainstem)